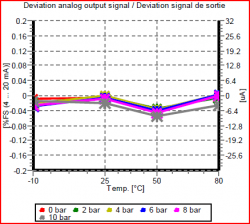
 Unfortunately there is no universally adopted convention for specifying the accuracy of pressure sensors. Although there are standards such as IEC60770 and DIN16086 most manufacturers do not specify them in their data sheets. It is therefore up to the user to analyse each data sheet to understand what parameters are included in the accuracy statement and what technique was used, so that a true comparison can be made.
The accuracy of a pressure sensor can be broken down into a few contributing components which are linearity, hysteresis, short term repeatability, temperature errors, thermal hysteresis, long term stability and zero & span offsets.
Featured pressure sensor products
 UPS-HSR USB Pressure Sensor with High Sample Rate Logging - USB ready digital pressure sensor for recording pressures with a high speed sample rate of up to 1 kHz to a computer.
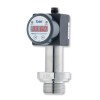 10 bar g steam pressure transmitter, indicator and PNP switch - Steam pressure transmitter with LED display indicator for measuring 0 to 10 bars with in-built temperature reducer
Linearity
The linearity of a pressure sensor is rarely indicated as a separate component. The linearity refers to the straightness of the output signal at various equally spaced pressure points applied in an increasing direction. It should not be confused with accuracy which refers to how close a measured output or reading is to the actual pressure rather than how straight they all are.
Pressure Hysteresis
The proportion of pressure hysteresis can vary depending on the sensor technology and typically it is incorporated with linearity to define the precision of the pressure sensor. The pressure hysteresis is measured by taking the difference between 2 output signals taken at the exactly the same pressure but during a sequence of increasing and decreasing pressure.
Short Term Repeatability
The precision of a pressure sensor sometimes includes short term repeatability errors. This is an indication of how stable a pressure sensor is after a series of pressure cycles. The same pressure point from each pressure cycle is compared with the first cycle to determine the amount of change. This is rarely shown as a separate error on a data sheet and is usually incorporated into a combined non-linearity, hysteresis and repeatability (NLHR) error statement.
Temperature Error
The accuracy performance of a pressure sensor over a range of temperatures is normally quoted in a separate section of the technical data sheet. The temperature errors are normally specified over a maximum and minimum temperature which is called the compensated temperature range and does not necessarily refer to the operating temperature range which is often wider than the compensated temperature range for a pressure sensor.
The temperature error is either expressed as a percentage of full scale for the total compensated temperature range or as a percentage of full scale per degree Celsius, Fahrenheit or Kelvin. Very often the thermal error component at zero pressure and the thermal error of pressure sensitivity (span) are split out and indicated separately.
Thermal Hysteresis
Thermal hysteresis refers to the change of a specific pressure point at a particular temperature measured during a sequence of increasing temperature and decreasing temperature. Thermal hysteresis is unlikely to be mentioned in a pressure sensor specification so it is difficult to determine whether it has been included in the overall temperature errors or not. If thermal hysteresis is indicated it will be expressed as a percentage of full scale over the compensated temperature range.
Long Term Stability
Long term stability is a measure of how much the output signal will drift over time under normal operating conditions. The long term drift is expressed as a percentage of full scale over a period of time normally a period of 12 months. Sometimes the zero and span long term stability is quoted separately especially if one is much larger than the other. Long term drift is really only a figure for comparing one technology with another and cannot be relied on for a particular application. This is because the amount of pressure cycling, temperature cycling, vibration and shock the pressure sensor will be subjected to over its service life is not easily predictable. All of these factors will affect the pressure sensor’s performance to varying degrees depending on amplitude and frequency.
Zero & Span Offsets
Zero and span offsets are the actual signal outputs at zero and full span. They are either expressed as percentages of full span or as electrical units such as millivolts or milliamps. Typically they are indicated as separate items on a pressure sensor data sheet. If the pressure sensor is going to be calibrated when installed, the zero and span offset can be easily eliminated. But if the pressure sensors have to be installed or replaced without calibration they must be included in the overall accuracy of the pressure sensor.
Featured pressure sensor products
 High Speed Pressure Sensors - xplore high-speed pressure sensors designed for capturing rapid transients and dynamic events. Understand frequency response, rise time, and system limitations for accurate test and research data.
 IWPT Wireless Battery Powered Pressure Sensor and Receiver - Wireless battery powered pressure sensor and receiver system for connecting pressure sensors without wires to a central wireless receiver which converts each received pressure signal channel to a 1-5Vdc, 4-20mA output, USB, Ethernet TCP, RS232 RTU, RS485 RTU or 2G 3G 4G mobile cellular network.
Help
Slight positive output despite zero or vacuum pressure input
I have 4-20mA output pressure sensors on a fleet of equipment, all with a range of 2500 psi, and I have noticed that when there is zero pressure on the sensor, and possibly negative pressure (vacuum), the sensor will read a slight amount of pressure of up to a few psi. Is this normal or does this sensor need to be replaced?
Yes this is normal. If these are fixed range 4-20mA pressure sensors, then when manufactured they will all have a slight offset. Over time this offset will change, may get worse or better, but should always be small in relation to the overall pressure range.
4 psi would represent 0.16% of a 2500 psi range, or 0.0256mA of a 16mA. It’s not unusual for a manufacturer to include a tolerance of 0.05mA. This is normally acceptable since the end user can adjust the instrumentation to eliminate the offset during setup and calibration.
The accuracy of a pressure sensor is typically based on the straightness of the output signal over the range, rather than zero and full scale setting, since it is expected that this will be set during calibration.
Media vs environment temperature compensation
I was under the impression that temperature compensation refers more to the temperature the pressure sensor body sees and not so much the temperature of the media in contact with the diaphragm in the sensor?
For a strain gauge type pressure sensor, the components most sensitive to temperature changes are the strain gauges located on the sensing diaphragm, which are normally very close to the process media.
The signal processing and digital compensation circuitry is further away in the sensor housing, but it is mostly unaffected by temperature changes, since all the components have very low thermal coefficients.
The strain gauges are highly sensitive to temperature changes, because they have to be highly sensitive to expansion/contraction by the applied pressure. Therefore thermal expansion/contraction of the strain gauges will translate as a significant pressure reading error if not compensated.
Determine overall accuracy
Each manufacturer gives too many terms for accuracy like repeat-ability, hysteresis, non linearity , stability, variation due to temperature… How do you arrive at the overall accuracy?
Unfortunately there is no easy way to do this, the simplest method is to perform a “root of sum of squares” of all the %FS errors to obtain a realistic total error: Square each error and add them together, then take the square root of the answer.
Accuracy standardisation
How can we determine the allowable deviation of any pressure related instrument? Any particular standard to be followed?
There is no specific standard for the level of accuracy, every product has a different accuracy performance specification and every application has a particular accuracy requirement.
Typically the user would determine how accurate a measurement needs to be from the allowable process tolerances. The pressure instrument would need to be better than the required accuracy including an allowance for temperature errors and long term drift/instability of performance.
The pressure instrument technical data sheet should indicate the accuracy performance specified by the manufacturer, with this information it can be determined whether it falls inside the required accuracy for the process being measured.
There are engineering standards such as IEC 60770 for defining how accuracy should be calculated, which helps when comparing different products, but they do not recommend error values.
Featured pressure sensor products
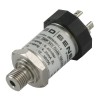 ATEX approved negative 10 mbar vacuum pressure transmitter - ATEX certified intrinsically safe pressure transmitter for measuring from 0 to minus 10 millibar gauge vacuum pressure.
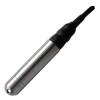 Underwater Pressure Sensors - Explore IP68-rated underwater pressure sensors designed for continuous submersion. Ideal for ballast tank level, subsea system monitoring, and hollow structure flood detection.
Can touching cause unstable readings
We have some OEM pressure sensors with a mv/V output on a test bench connected to a digital display indicator. The readings change a few PSI if the transducer’s wires or housing is touched by a hand or hands moving around the sensors. What could be causing the sensor to drift?
Here are some of the possible causes:
- Electrostatic Charge – like with other electronic components, precautions should be taken to ensure there is no possibility of electrostatic charge coming into contact with small and sensitive mV/V OEM pressure sensors. If the operator is not wearing an anti-static wrist strap they maybe applying an electrostatic charge to the sensor which is interfering with the output signal.
- Mechanical Stress – if a load is applied to the sensor body through touching, it can sometimes be passed through the materials to the diaphragm causing a small shift in sensor output.
- Temperature Changes – pressure sensors are sensitive to temperature changes, so holding the sensor can cause the sensor output to change because ambient temperature is different to human body temperature.
- Wiring Connections – poor soldering contacts/dry joints can cause fluctuations in sensor output especially if touched or moved around.
- Damaged Sensor – partial electrical or mechanical damage to the sensor, which only shows as a intermittent fault when the sensor is physically disturbed.
Repeatable and non-repeatable errors
What is the difference between repeatable and non-repeatable errors when considering a pressure sensor specification?
Repeatable errors refer to the uncertainties that are predictable which are possible to characterize or remove from the measurement with extra analogue conditioning or microprocessor based electronics. Typically for a pressure measurement device the repeatable errors are linearity and thermal zero/span shift errors.
Non-repeatable errors are measurement uncertainties that are too complex to predict and characterise such as hysteresis, short term repeatability and long term stability. Unrepeatable errors vary depending on the pressure change, number and frequency of pressure cycles, and therefore are application specific.
Analysing linearity, hysteresis and full scale error
I have a pressure transducer and would like to know how to analyse the linearity, hysteresis and full scale error for calibration purposes. I would also like to know how to produce best fit data from the calibration results.
Linearity errors refers to the straightness of a set of pressure step points which were collected whilst steadily increasing the pressure.
Hysteresis errors when dealt with separately, are calculated by comparing the output signal at the same pressure point from a set of increasing and decreasing pressure data. However when hysteresis is included with other data to calculate the overall accuracy performance, each point is considered separately and compared to the best straight line.
The full scale error (%FS) can include some or all of the following errors: linearity, hysteresis, repeatability and thermal.
The Least Squares formula is the math typically used for determining the best straight line from a set of measurement results. Once the best straight line (BSL) has been determined, the output variation at each test point can be compared to the BSL to determine the error. The test point with the maximum deviation from the BSL is used to represent the overall performance of the pressure transducer. If the deviation in electrical units is divided by the output signal range and then multiplied by 100, this will define the percentage of full scale accuracy (%FS).
Stability vs Drift
Can you explain the parameters of stability and drift for a pressure measurement device by giving examples and differentiating between them?
Long term stability refers to how well the original accuracy performance is maintained over a period of time, any change is unpredictable and can vary in either direction, so it is a maximum +/- long term additional error.
Long term drift is a continuous change in one direction only, so for example the spec might say that the zero offset will change by 0.1% per year in the positive direction due to mechanical fatigue of the diaphragm over time.
However you will find that manufacturers do not differentiate between these two terms when describing the long term performance of pressure measurement devices. Each manufacturer could you use either term to mean the same thing and are unlikely to include a specification for each in the same product specification.
Featured pressure sensor products
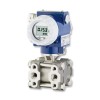 Differential Pressure Transmitters - Differential pressure transmitters for measuring the DP of fluids and gases across particle filters and along a length of pipe to monitor flow.
 Pressure Sensors for Data Logging with a Computer - Easily log and analyze pressure data on your PC. These digital sensors connect via serial interfaces and come with software for preset interval logging of fluids and gases.
Measuring linearity error
How do you determine the linearity error of a pressure transducer?
To calculate the linearity of a pressure transducer, first you must collect the measurement data. The typical way to do this is to apply pressure at fixed intervals from zero to full scale pressure and measure the output at each pressure set-point. The more pressure points there are, the more accurate will be the linearity calculation. The minimum number of points to determine linearity is 3 points and there is no limit on the maximum, but 5-10 points is typical for one set of pressure points.
Once the measurements have been recorded, it is then necessary to determine which straight line you are going to compare the test data with. There are a few different lines that can be used to calculate the linearity error of a pressure transducer, the following are three of the most widely used:
Best Straight Line
This line normally produces the smallest errors because it is optimised to all the measurement points to produce the smallest average deviation. Various mathematical methods can be utilised to determine the offset and gradient of the line, from a simple line drawn halfway between two parallel lines that enclose all the points to a least squares fit computation.
Terminal Straight Line
Although this does not produce the smallest errors, it is very useful for indicating the realistic linearity performance from a typical installation. The line is determined by simply drawing a straight line between the output reading at zero and full range pressure. Often when a pressure transducer is connected to a measurement instrument, the pressure transducer’s output is converted to a reading by setting zero and full range pressure and assuming a straight line between the two points. This is the simplest and most convenient calibration method.
Perfect Straight Line
The output at each measurement point is directly compared to the output of a perfectly accurate pressure transducer:
e.g. 0 to 5 bar range with a 0 to 10 Volt output would generate exactly 2.5 volt at 1.25 bar
This is rarely used for pressure transducers because they often do not include the trimming component to adjust the zero offset and the span gain. No two pressure transducers are exactly the same and they all have different zero and span characteristics that can deviate by a much greater factor than the linearity error. So for a batch of pressure transducers the linearity error specification would need to be much greater to include the variation in zero and span characteristics. There are some applications which require a perfect straight line, for example: on fit and forget applications which require direct replacements for failed pressure transducers without any calibration of zero and span settings.
It is not always obvious form a pressure transducer specification data sheet which method has been used to specify the linearity error, so if accuracy is an important factor you should ask the manufacturer which straight line method was used.
Measuring hysteresis error
How do you measure the hysteresis error of a pressure transducer?
The way that a pressure transducer is checked for hysteresis is to apply pressure from zero to full scale pressure, typically stopping without overshoot at 5 equally spaced steps in pressure to measure the value. Then repeat the procedure in the opposite direction from full scale to zero pressure.
To ensure the best results it is important that the pressure is carefully controlled so that it does not go past the measurement point, since a change in the direction of the applied pressure will introduce secondary hysteresis effects.
The hysteresis error will be the deviation in value between the increasing and decreasing pressure value measured at the same step point. The % hysteresis can then be determined by taking the maximum deviation and dividing it by the the full range pressure.
% Hysteresis = ((iV3 - dV3)/FRO) x 100
- iV3 = Voltage out for increasing pressure point 3
- dV3 = Voltage out for decreasing pressure point 3
- FRO = Full range output
Pressure sensor drift caused by high vacuum
What causes a pressure sensor to drift after being exposed to a high vacuum?
Sensors which have a design that includes an oil filled capsule with a thin isolation diaphragm can be affected by a sustained high vacuum. This happens because the oil slowly outgasses at very low pressures, creating a low pressure gas pocket inside the capsule, which in turn leads to an unstable zero reading. This effect can be reduced during manufacture by heating the oil and exposing it to a high vacuum prior to filling the sensing capsule. Since manufacturers develop their own unique manufacturing processes, the susceptibility of an oil filled sensor to drift when exposed to a high vacuum will vary across different types and makes of sensors.
Converting a pressure reading error to a % full scale error
I have a question about converting error at target pressure to error in % Full scale. For example, if I have a 0 to 2850 bar pressure sensor and I am taking a reading at 1000 bar (target) and the sensors is reading 998.5 bar, I know the %error at the target pressure is 0.15%. How do I convert that number to %FS?
2850 bar = FS
Error = 1000 bar – 998.5 bar = 1.5 bar
Error expressed as a %FS = (1.5 bar / 2850 bar) x 100 = 0.05263 % FS
Use this calibration error calculator to convert any measurement to a percentage of full scale error.
Low absolute diaphragm based pressure sensors
Is it possible to measure low absolute pressures from 0 to 10 mbar to a high degree of accuracy if using a diaphragm based pressure sensor with a pressure range of 0 to 1000 mbar absolute?
The biggest error for most devices at the low end of the scale (assuming temperature is always the same within a few degC) will be zero stability, since it is particularly hard to zero tare absolute devices regularly because you have to generate a high vacuum or a very low pressure reference. It is unlikely a manufacturer will have mapped or characterised zero stability since it depends on the application how much drift to expect over time. There is also span stability but this is generally smaller in magnitude than zero stability especially at the low end of the scale.
As a very rough guideline most manufacturers quote 0.1 to 0.2% full span per year for zero drift. All absolute ranges have to be protected for 1 bar absolute, some will use a 1 bar rated diaphragm, but others that have developed sensing diaphragms with greater sensitivity will be able to quote better performance at the lower end, but beware of the long term stability errors, these are often not included in manufacturer error statements.
The other issue to consider is the bit resolution of the digital amplifier to produce the 0-10Vdc output which is used in most sensors these days, this is not always included in the spec, and with some manufacturers they do not use a very high resolution so it is difficult to achieve much better accuracy the stated performance since the output is limited to a fixed step interval. A millivolt output would provide the best resolution since it is the raw output signal from the strain gauges, but then you have deal with the compensation of the device.
To achieve the best accuracy the best way is to map a mV output sensor yourself or obtain a digital compensated / output sensor, but these can be very expensive especially if the manufacturer has to conduct a special compensation of more points at the lower end. However no device will be compensated for long term zero stability.
Featured pressure sensor products
 Steam Pressure Transmitters - Accurately measure steam pressure in autoclaves, power plants, and food processing. Discover transmitters built to withstand high temperatures with reliable current outputs.
 HART® Pressure Transmitters - Explore HART pressure transmitters utilizing digital communication over standard 4-20mA wiring for advanced diagnostics, remote configuration, and seamless DCS integration.
BSL vs TSL
What is the BSL and TSL accuracy of a pressure sensor?
There are two widely used ways to define the room temperature accuracy of a pressure sensor. The relevance of each will depend on how you intend to install the pressure sensor and how important it is to achieve the optimum accuracy.
There are three significant components that make up the room temperature accuracy which are Non-Linearity, Hysteresis and Short Term Repeatability. These are normally expressed as a total error combining all three parameters and on occasions only the first two. When abbreviated they are shown as NLH, NLHR, LH or LHR. E.g. ±0.1% full scale BSL NLHR.
The manufacturer will check the performance of these parameters typically by performing 3 cycles of 6 rising and 5 falling pressure points. Since it is normal to set zero and span when installing them, the achievable accuracy is equivalent to how close all the points are to an imaginary Best Straight Line or BSL. This is determined by using a mathematical least squares fit method to analyse all the calibration data collected to determine an ideal reference line that achieves the best possible accuracy for all the measured points.
The other method for reference calibration data is the Terminal Straight Line or TSL method which ties the line for which all measured points are compared to with the lowest and highest measured reading and not the best straight line. This method is considered more relevant to the practicalities of installing a pressure sensor, since it is much easier to set the zero and span to the lowest and highest output rather than a virtual Best Straight Line that is unlikely to coincide exactly with the zero and full scale pressure reading.
However the TSL method leads to accuracies which are typically 2x greater than those obtained using the best straight line method effectively compromising accuracy for convenience of installation. Since manufacturers wish to promote the full potential accuracy of their pressure sensors the BSL method is often quoted in preference to the TSL method on product data sheets. There are other factors to consider when installing pressure sensors such as temperature errors and long term drift but typically it is only the room temperature accuracy that is considered when specifying a pressure sensor.
%FS NLHR BSL meaning
What is % FS NLHR BSL accuracy and how is it calculated?
The meaning of the acronyms used in this accuracy statement are:
- FS – full scale – typically this is the pressure range, the difference between the lowest measured pressure and the highest measured pressure.
- NLHR – non-linearity, hysteresis and short term repeatability.
- BSL – best straight line – a mathematical method of error representation which produces the smallest error by finding the optimal line through a series of measurement points.
The repeatability portion of the accuracy statement refers to short term repeatability error, which is obtained by collecting a 2nd and 3rd cycle of calibration points shortly after the 1st has been collected. Each pressure point is compared with the same point in the 2nd and 3rd cycle to determine the repeatability error.
To determine the overall NLHR using the best straight line (BSL) method, you would enter all the individual pressure points for linearity, hysteresis and repeatability into a least squares formula.
Signal output setting errors
How are setting errors considered in the overall accuracy of a pressure sensor?
Setting offsets are normally split between zero and span setting. You can check the zero setting by applying the lowest pressure (typically zero pressure, open to atmosphere) and the span can be checked by applying full range pressure.
The full range reading is slightly different to Span reading e.g. zero output = 3.96mA, full scale output = 20.72mA, therefore Span = 16.76mA. Zero would be adjusted by +0.04mA and Span would need to be adjusted by -0.76mA to calibrate zero and full scale precisely to 4 to 20mA.
Typically setting offsets are not included in accuracy statements and should be added to the accuracy statement to determine the overall uncertainty, unless it is not possible to calibrate out the setting errors during installation.
Featured pressure sensor products
 DMP320 0.5 msec Fast Response Pressure Sensor - High frequency response pressure sensor with a better than 0.5 millisecond response time and internal digital signal conditioning that samples readings at a rate of 10 kilohertz.
 UPS-HSR USB Pressure Sensor with High Sample Rate Logging - USB ready digital pressure sensor for recording pressures with a high speed sample rate of up to 1 kHz to a computer.
Related Help Guides
- Determining calibration error of Bourdon tube pressure gauge
- Measurement Accuracy
- What is the difference between zero offset and zero drift?
- Choosing calibrator for pressure transmitters
- Checking the LHR error of a 0-5 Vdc output pressure transducer
- Selecting the correct pressure sensor range for low-level applications
- Shunt resistor calibration explanation
- What affects the performance of low pressure sensors
- How does the accuracy of pressure measurement devices change over time
Related Technical Terms
- Accuracy
- BSL – Best Straight Line
- Compensated Temperature Range
- Digital Compensation
- g Effect
- Hysteresis
- LHR – Linearity, Hysteresis and Repeatability
- Long Term Stability/Drift
- NL – Non-Linearity
- PPM – Parts Per Million
- Precision
- Pressure Hysteresis
- Repeatability
- RTE – Referred Temperature Error
- Secondary Pressure Standard
- TEB – Temperature Error Band
- TEB – Total Error Band
- Temperature Compensation
- Temperature Error
- Thermal Hysteresis
- Threshold
- TSL – Terminal Straight Line
- TSS – Thermal Span or Sensitivity Shift
- TZS – Thermal Zero Shift
Related Online Tools
- Pressure Sensor Calculator
- Temperature Sensor Calculator
- Pressure Sensing Errors Calculator
- Pressure Measurement Accuracy and Error Calculator
Related Application Questions and Answers
Contact us about this Pressure Sensor Accuracy Specifications page to request more information, or to discuss your application requirements.
