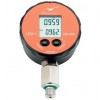
This guide will answer many of your questions about using & selecting pressure calibration equipment.
Pressure calibration is a essential function within most industries where measurement instrumentation is used to monitor process performance and safety.
Many companies are now approved and certified to quality standards such as the ISO9000. To maintain quality standards, there are numerous quality procedures, and because many industrial processes rely on the measurement of pressure, pressure calibration plays a major part in a companies quality assurance.
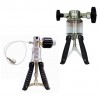 Calibration Hand Pumps - Explore pneumatic and hydraulic calibration hand pumps for precise pressure/vacuum generation. Ideal for labs, factories & process plants with pressure transfer standards.
 Low Pressure Calibrators - Explore low pressure calibrators featuring fine volume adjustment pumps and high-accuracy indicators for precise calibration in Pa, mbar, or "WC ranges. Ideal for sensitive instruments.
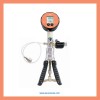 Suction Pressure Calibration Equipment - Select a calibration equipment for calibrating suction pressure measuring devices, and generating suction pressure for setting calibration points.
 Vacuum Range Calibration Equipment - Maintain the accuracy of your vacuum sensors, gauges, and switches with high-quality vacuum calibration equipment.
 Air Pressure Calibrators - Ensure the accuracy of your pneumatic pressure instruments with our range of pressure calibrators, hand pumps, and test gauges.
 DPC Low Range Pressure Controller and Calibrator
 DM01-500-HD High Range Digital Pressure Gauge
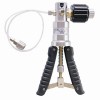 PGS40 Mid Pressure Calibration Hand Pump
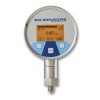 Theme park ride pneumatic controls digital pressure test gauge - High accuracy pressure gauge for portable use to check and test theme park ride pneumatic air control systems,
 30 psi absolute portable calibration data logging air pressure gauge with 1/4 NPT male fitting - Digital display pressure gauge for portable calibration use in air measurement applications, capable of measuring 0 to 30 psi abs pressure with 0.1% accuracy and connected using a 1/4 NPT male fitting. Also includes USB, logger, and data transfer software.
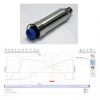 70,000 psi usb pressure sensor for calibration use with hydraulic screw press and PC computer - An ultra high range digital pressure sensor for calibration use to measure pressure of hydraulic oil over a range of 0 to 70,000 psi g from the Autoclave F-250-C female process connection, and sending the corresponding pressure reading through USB interface to the PC monitoring and logging software.
Pressure calibration is indeed a cornerstone of quality assurance in industries relying on precise pressure measurement. It ensures the accuracy and reliability of pressure instrumentation, impacting both process efficiency and safety. This guide focuses on the key considerations for engineers selecting pressure calibration equipment, moving beyond the basics to address specific application needs.
The user base for pressure calibration equipment is broad, encompassing design engineers specifying equipment for new installations, installation engineers commissioning systems, control and instrumentation engineers maintaining process control loops, and maintenance engineers ensuring ongoing accuracy of installed instruments. Industries with a high reliance on pressure measurement, and therefore calibration, span diverse sectors. These include, but are not limited to, oil and gas, chemical processing, pharmaceutical manufacturing, aerospace, power generation, and water treatment. Locations range from onshore and offshore facilities to laboratories, cleanrooms, and remote field installations.
When selecting pressure calibration equipment, several application-specific factors come into play. Firstly, the pressure range and type (gauge, absolute, differential) of the instruments being calibrated must be matched to the calibrator’s capabilities. Consider the required accuracy and stability of the calibration standard, often expressed as a percentage of reading or full scale. This choice depends on the criticality of the pressure measurement in the process. Portability is another key factor. Do you need a benchtop calibrator for a controlled environment, or a portable, ruggedized unit for on-site calibration in challenging conditions? The media compatibility of the calibrator is crucial. Will it be used with gases, liquids, or both? Are there any corrosive or hazardous media involved that require specialized materials and seals? Automation features, such as data logging and automated calibration routines, can significantly improve efficiency and reduce the risk of human error, especially when dealing with a high volume of calibrations. Finally, consider the communication interfaces (e.g., HART, Fieldbus) required for integration with existing control systems or calibration management software.
Several pitfalls should be avoided when selecting pressure calibration equipment. Choosing a calibrator with insufficient accuracy for the instruments being calibrated renders the calibration process meaningless. Overlooking the influence of environmental conditions, such as temperature and humidity, can introduce significant errors. Failing to consider the long-term stability and recalibration requirements of the calibrator can lead to inaccurate measurements over time. Finally, neglecting the importance of proper training for personnel using the calibration equipment can result in incorrect procedures and unreliable results. By carefully considering these factors and avoiding these common pitfalls, engineers can select the right pressure calibration equipment to ensure accurate and reliable pressure measurements in their specific applications.
Featured pressure calibration products
 DM01-500-HD High Range Digital Pressure Gauge - The DM01-500 HD high range pressure gauge is available in pressure ranges from 0 to 600, 1000, 1600, 2000 & 2200 bar.
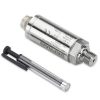 Zero & Span calibration adjustable signal output pressure transducers - Pressure transducers that have an adjustable zero and span so that the output siganl can be adjusted if they go slightly out of calibration
Questions & Answers
Answers to questions asked about pressure calibration techniques and terminology.
Pressure sensor calibration procedure for industry standards compliance
What is the recommended calibration procedure for an industrial pressure sensor that needs to comply with a specific quality or safety standard, such as BS 8417 for wood preservation, and how is the required accuracy tolerance determined?
The calibration requirements for a pressure sensor are typically dictated by the end-user’s quality management system or the specific industry standard they need to adhere to. For applications like timber treatment governed by BS 8417, an annual calibration interval is a common requirement.
A comprehensive calibration procedure involves checking the sensor’s performance at multiple points across its measurement range during both rising and falling pressure cycles. This method is crucial for verifying not only the sensor’s accuracy but also its linearity and hysteresis. Hysteresis is the difference in output reading at a specific pressure point when approached from a low-to-high direction versus a high-to-low direction. It is a critical parameter in applications involving pressurisation and depressurisation cycles, such as in a timber treatment autoclave, where it ensures consistent measurement regardless of the pressure cycle direction.
The calibration is performed using a traceable calibration standard that is significantly more accurate than the sensor being tested. Common multi-point calibration cycles include:
- 5-Point Calibration: Checks at 0%, 50%, 100% of the range, and then back down through 50% and 0%. This provides a basic check of zero, span, and hysteresis.
- 9-Point Calibration: A more thorough check at 0%, 25%, 50%, 75%, 100%, and then decreasing through 75%, 50%, 25%, and 0%.
- 11-Point Calibration: An even more detailed check in 20% increments (0%, 20%, 40%, 60%, 80%, 100%, and back down).
The choice of cycle depends on the criticality of the measurement. For a process like timber preservation, a 9 or 11-point calibration provides high confidence in the sensor’s performance throughout the entire vacuum and pressure treatment cycle.
The required accuracy for the sensor is determined by the process tolerances of the application. The end-user must define the maximum permissible error for the pressure measurement that will not negatively impact product quality or safety. If the user is uncertain about the required accuracy, the manufacturer’s specification as stated on the product datasheet should be used as the benchmark for the pass/fail criteria during calibration. Using a sensor with an accuracy that is appropriate for the process ensures both compliance and efficient operation without over-specifying and incurring unnecessary costs.
Calibrating without adjustment
How is it possible to calibrate a pressure sensor with no zero or span adjustment, or a digital pressure gauge which can only be adjusted by the manufacturer?
In the good old days, the accuracy was less stable than they are today for the majority of pressure instruments, and many included zero & span adjustment screws to allow technicians to regularly trim out the errors that would develop over time.
Today, the sensing technology has advanced to improve long term measurement stability so much, that many devices will stay within the manufacturer’s original specifications for accuracy and will only need the occasional zero trim.
Also the introduction of digital compensation techniques to improve accuracy over the operating pressure & temperature range, has increased the complexity of signal conditioning, with look-up data tables and algorithms being used to fine-tune accuracy performance. Due to this complexity, many manufacturers are blocking access to the calibration settings to prevent inadvertently upsetting the various parameters used to digitally compensate a pressure sensing device.
So where before, one would carry out an “As Found” calibration check, then make some adjustments to zero & span settings, and then carry out an “As Left” calibration check, this is becoming a redundant calibration method, and is being replaced by a once only calibration check, often called “As Found”, to verify the accuracy performance is satisfactory.
Often it is the case that the required accuracy is worse than the one stated on the manufacturer’s data sheet specification. So even if the device has deteriorated beyond the manufacturer’s specification, it may still be acceptable to continue use it. However, if the rate of accuracy deterioration increases between regular calibration checks, this would normally indicate it is time to replace.
Ensuring accuracy where re-calibration is not possible
I have a pressure sensor installed on a system that cannot be accessed for the purpose of regular re-calibration, is there another way to ensure that the pressure sensor is still working within acceptable error tolerances?
In applications where it is impossible to check the calibration of a pressure sensor over a long period of time, you have a few ways to ensure accuracy of the device.
One solution is to to determine the required accuracy over the life of the installation and select a sensor where the long term uncertainty error has been tested or determined by accelerated life time testing.
Another solution is to fit 2 or 3 sensors for the same measurement, since they are unlikely to change by the same amount over time. If one of the pressure sensors starts to output a different value to the other(s), then you can determine whether the change is significant enough to question the performance accuracy of that group of sensors.
Extrapolating the possible error of the pressure service over the service life based on a short term test, or a theoretical estimate of accuracy performance based on manufacturer’s indicated values for long term stability are techniques often used to establish confidence in the performance of a particular pressure sensor type. However it is a much less reliable method since there is no way to test or monitor the assumptions made about the pressure sensor over time.
Featured pressure calibration products
 Zero & Span calibration adjustable signal output pressure transducers - Pressure transducers that have an adjustable zero and span so that the output siganl can be adjusted if they go slightly out of calibration
 Air Pressure Calibrators - Ensure the accuracy of your pneumatic pressure instruments with our range of pressure calibrators, hand pumps, and test gauges.
How often to calibrate pressure instruments
How often should you calibrate pressure instrumentation?
There is no recommended fixed period of time for re-calibrating pressure instruments since they all differ from each other in how accurately they measure pressure and how stable they are over time. Ideally if pressure measurement performance is critical to your business operation it is advisable to calibrate all pressure measuring devices as frequently as possible. Once at least 3 sets of calibration test results has been collected, the data can be compared to determine whether the re-calibration cycle can be lengthened.
The stability of performance can vary quite a lot from one instrument to another due to the different kinds of sensing technology. The environmental conditions and frequency of use will also affect the performance. So it is very difficult to predict when and how much an instrument will drift out of calibration.
The general rule of thumb is once per year for most instruments, if you are looking to comply with ISO9000. A label maybe placed on the instrument with a reminder date (normally 1 year). If the instrument is heavily used it might need to be re-calibrated more often, depending on the level of measurement accuracy required.
When you send an instrument for re-calibration, it will be tested to see if it is still within the specified accuracy and the results will be recorded on the calibration certificate as “as found/received results”.
If the instrument is outside specification, an attempt will be made to adjust the readings to bring the instrument back into specification. The new results will recorded on the calibration certificate as “as left results”
If the calibration certificate includes before and after adjustment data then you can make a judgement on the re-calibration interval next time.
If the calibration certificate only includes the before data, then the instrument did not require any adjustment. The amount of deviation compared to the last calibration will tell you whether you can lengthen or need to shorten the re-calibration interval.
Required accuracy of pressure calibrator
How accurate does a pressure calibrator need to be?
This will depend on the required of the devices being calibrated. For example a process may only require a 1% accuracy for a pressure gauge which has an accuracy of 0.25% FS. So although the device is capable of achieving a 0.25% accuracy it only needs to be verified to be within 1%. Ideally you should try to aim for a 10 to 1 ratio between calibrator and device under test accuracy, but a lower ratio is often accepted, since many devices now offer much higher accuracies, making it more difficult to source a calibrator which is cost effective.
Featured pressure calibration products
 Suction Pressure Calibration Equipment - Select a calibration equipment for calibrating suction pressure measuring devices, and generating suction pressure for setting calibration points.
 Calibration Hand Pumps - Explore pneumatic and hydraulic calibration hand pumps for precise pressure/vacuum generation. Ideal for labs, factories & process plants with pressure transfer standards.
Using psi readings to calibrate bar measurements
Can a master pressure gauge scaled in psi be used to calibrate a process pressure gauge scaled in bar?
Yes it can, first convert the pressure range of the master gauge to determine it’s equivalent value in bar, e.g. a 30 bar range is approximately 450 psi and would be suitable for calibrating process gauges up to that range. How low a range can be calibrated will depend on the difference in precision between the two instruments. When converting pressure units for calibration purposes make sure it is an accurate conversion so that no additional errors are introduced.
Reading error between points on a dial gauge
How do you read the error of an analogue dial pressure gauge when the reading is between two dial marks?
Apart from precision test gauges the dial marker (cardinal point) can be separated by a large gap without any graduation making it difficult to determine the exact reading. When calibrating these types of gauges it is best to set the required pressure using the device under test rather than the calibrator since it is easier to set the pressure to a cardinal point. The error can then be read more accurately from the calibrator where you will be able to read the pressure with much better resolution.
e.g. A 30 bar gauge with 1 bar incremental marks is calibrated using a 30 bar calibrator with 0.1 bar incremental marks or resolution. To calibrate at the mid point of 15 bar, apply pressure to the gauge until the dial needle is lined up exactly with 15 bar cardinal point. Next note the pressure on the calibrator which might read something like 15.3 bar. If the calibration was performed the other way around you would have to approximate the 0.3 bar error since there is only a 1 bar reading resolution.
Increasing & decreasing calibration points
Why do calibration procedures include increasing and decreasing points?
Many pressure measuring instruments utilize a mechanical sensing device which relies on the deformation of a material when pressure is applied. When a material is flexed, it will change shape slightly differently when the stress is released and the material is allowed to return to its original shape. This effect is called mechanical hysteresis and is what causes the difference in readings between increasing and decreasing pressure points. When testing a pressure instrument the accuracy should be checked over both increasing and decreasing pressures to account for any hysteresis related errors. When considering hysteresis it is important to use a calibrator that has a much smaller hysteresis characteristic than the device under test.
Traceable pressure calibration
What does “traceable” or “traceability” mean in relation to pressure calibration?
Most countries have a National Standards Laboratory which is tasked with providing and maintaining the countries most accurate measurement instruments which are the primary source of the countries measurement standards. In order to ensure all measurement devices are within the expected level of accuracy performance they must be regularly checked using a more accurate calibrator. The calibration is only truly valid if the calibrator accuracy has been verified. The validity of a calibrator’s accuracy is determined by the quality of it’s calibration, therefore a traceable calibration certificate should include some form of statement indicating that it can be traced back to national standards. If necessary it should be possible for a calibration certificate to provide enough information to enable a person to trace back the calibration of calibrators through the hierarchy of calibration equipment used by the manufacturer or service provider ultimately to the national standard. The actual cal cert does not have to include the complete trace back to the national standard, but it is expected that if a particular business was to be audited it should be able to prove traceability by producing calibration records.
Traceable vs UKAS calibration
In the UK what is the difference between a traceable calibration and a UKAS calibration?
A traceable calibration certificate may only include a statement such as “traceable to national standards” or the type and serial number of the calibration equipment. There is no way to verify this without auditing the company quality assurance system to validate the statement. Therefore without the benefit of a quality audit the authority of a traceable cal cert is based on the trust and reputation of the supplying company. To provide a more trusted calibration certificate, some companies choose to become UKAS (United Kingdom Accreditation Service) certified. This involves an assessment of the calibration equipment and staff to make sure they both meet a required standard and subsequent assessments are carried out to maintain accreditation. If a company is UKAS approved it is able to issue its own UKAS approved calibration certificates.
Primary vs Secondary standard
What is the difference between a primary and secondary standard?
A Primary Standard uses technology that measures pressure using fundamental parameters such as mass and area in the case of a Dead Weight Tester or a head of fluid (e.g. water, mercury) in the case of a Liquid Column Manometer. A Secondary Standard is one that measures pressure indirectly via a gauge or sensor and should be calibrated on a regular basis using a more accurate secondary or primary standard.
Featured pressure calibration products
 Vacuum Range Calibration Equipment - Maintain the accuracy of your vacuum sensors, gauges, and switches with high-quality vacuum calibration equipment.
 Low Pressure Calibrators - Explore low pressure calibrators featuring fine volume adjustment pumps and high-accuracy indicators for precise calibration in Pa, mbar, or "WC ranges. Ideal for sensitive instruments.
Cal cert validity
What is the validity of a calibration certificate?
A calibration certificates does not have a period of validity, since they are a record of measurement performance on the day tested and do not include any time period. A manufacturer may indicate stability performance over a period of time or recommend a re-calibration period as a guideline.
How often to calibrate a pressure calibrator
I expect digital precision pressure test gauges used for calibration purposes will eventually go out of calibration after frequent use. How often do you recommend to re-calibrate?
The re-calibration interval will depend on the following three factors which you would need to discuss and determine with your quality assurance department:
Accuracy required from the devices you are calibrating
The required accuracy of the equipment that is periodically checked does not necessarily have to be the manufacturer’s specified accuracy, often manufacturer’s specifications are much better than what is required by the user, so why check a pressure sensor against the manufacturers spec of 0.1% if you only need 0.5% accuracy(?)
Difference in accuracy between the reference test gauge and the devices being calibrated
The larger the ratio the better, between the accuracy of calibration equipment and the device under test. A ratio of 10 to 1 is becoming difficult to achieve as improvements in technology have narrowed the gap in accuracy between pressure calibration equipment and measurement devices. It is possible to use any ratio, even 1:1, as long as you factor into the uncertainty, both the calibrator and the unit under test into the overall accuracy constraint.
Stability of accuracy for the reference test gauge over time
If the long term stability of the calibration equipment is around 0.1% per year, and the accuracy is 0.05%FS. If you needed your equipment to be accurate to say 0.5% full scale, an annual re-calibration should be adequate for the calibration equipment to maintain ~ 3:1 ratio between the accuracy of the calibration standard and the pressure measurement equipment requiring calibration.
Once you have gathered this information together you will be able to determine an acceptable re-calibration period for the pressure calibration equipment. As a general rule combining all the errors to determine the total uncertainty will provide the worst case error. In reality the overall error will be smaller due to cancelling of opposing errors, and the root sum square (RSS) mathematical method can be used to produce more realistic numbers.
Featured pressure calibration products
 Low Pressure Calibrators - Explore low pressure calibrators featuring fine volume adjustment pumps and high-accuracy indicators for precise calibration in Pa, mbar, or "WC ranges. Ideal for sensitive instruments.
 DM01-500-HD High Range Digital Pressure Gauge - The DM01-500 HD high range pressure gauge is available in pressure ranges from 0 to 600, 1000, 1600, 2000 & 2200 bar.
How orientation affects calibrating a pressure sensor
I have been asked what sensor orientation should be used when calibrating a high accuracy pressure transducer. This is the first time I’ve been asked about orientation, why this is so important for this sensor?
All pressure sensor diaphragms will bend to varying degrees due to the gravitational weight of the diaphragm material and the weight of any fill fluid that might be present to protect the sensing element behind the diaphragm. This gravitational effect is more prominent with low pressure ranges which have thinner, larger diameter diaphragms, and with very high accuracy devices where the affect on performance is more noticeable.
If you hold the sensor so that the plane of the diaphragm is horizontal this will generate the most negative calibration offset. If you then flip the sensor upside down you will generate the most extreme positive calibration offset.
Therefore to ensure that the calibration results gathered in the lab correlate with the performance of the sensor when installed, it is necessary in some cases to duplicate the installed mounting orientation during calibration.
How is zero calibrated for an absolute pressure transducer
I have an absolute pressure transducer and need to check the output at zero pressure, how is the device checked when manufactured?
Most manufacturers will not calibrate at zero absolute pressure because it is difficult and time consuming to achieve a very high vacuum. To get round this problem, a zero point calibration is normally performed at a few millibar absolute and is extrapolated from all the calibration points using the best straight line method.
Rising/Falling results on cal certs
Why do Pressure Calibration Certificates show Rising and Falling Results?
When looking at a calibration certificate you will notice that the calibration points are set out in the order they were recorded as one set of rising results followed by a set of falling results.
The majority of pressure measurement equipment relies on the flexing of a mechanical component such as a metal diaphragm or a Bourdon Tube to sense a change in pressure. If you compare increasing pressure points to decreasing pressure points you will discover that the readings do not match exactly. This is due to Mechanical Hysteresis and the amount of error will vary depending on the amplitude of the cycle of pressure.
If each pressure calibration point is applied in an increasing or a decreasing sequence, the Hysteresis can be eliminated from the results leaving only the Linearity errors to be checked. The Hysteresis can then be checked independently of linearity by comparing the rising and falling calibration data collected over a full range cycle of pressure. If the calibration points are set randomly, there will be no way to separate Linearity and Hysteresis errors and therefore it will not be possible to quantify the contribution by each to the overall error.
Two instruments not reading the same pressure
My process pressure transmitter reads 12.5 bar but a pressure gauge in the same line measures 11 bar, what might be the problem?
Have both instruments been calibrated recently? If not we would suggest each device is disconnected from the system and compared to a traceable pressure & current measurement standard. If they are both reading correctly, then the problem is probably with the instrumentation connected to the pressure transmitter, which should be calibrated together with the pressure transmitter.
Related Help Guides
- Determining calibration error of Bourdon tube pressure gauge
- Choosing calibrator for pressure transmitters
- Checking the LHR error of a 0-5 Vdc output pressure transducer
- Diagnosing incorrect readings from a pressure measurement system
- Digital sensor for high precision pressure calibration
- Reduce calibration costs of analogue pressure gauges
- How does the accuracy of pressure measurement devices change over time
- Calibration Hand Pump performance depends on test volume
Related Technical Terms
Related Online Tools
- Pressure Transmitter 4-20mA Current Output Calculator
- Pressure Sensor Calculator
- DP Flow Transmitter Output Calculator
- Pressure Transducer Millivolt (mV) Output Calculator
- Pressure Transducer 0-10V Voltage Output Calculator
- Pressure Transducer 0-5V Voltage Output Calculator
- Pressure Transducer 1-5V Voltage Output Calculator
- Pressure Transducer 0.5-4.5V Voltage Output Calculator
- Pressure Sensing Errors Calculator
- Pressure Transmitter 0-20mA Current Output Calculator
Related Product and Application Guides
Related Application Questions and Answers
- Calibrate air pressure gauges ranging to 60psi with NPT fittings
- Pressure gauge and hand pump for calibrating up to 150psi?
- Calibrator for testing absolute pressure measurement devices
- Zero & Span calibration adjustable signal output pressure transducers
Contact us about this Pressure Calibration page to request more information, or to discuss your application requirements.

